November 30, 2005:
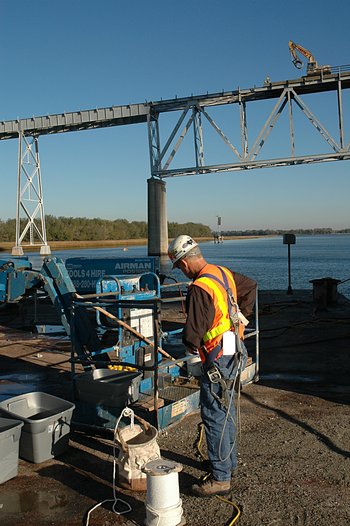
Prep and loading Pier D-25
After putting this together,
I visited Google using the search words dynamite sequence control -
and found 3 really
good tutorials. This is the first experiment designed to explore ways to
enable additional learning.
Implosion References (interesting, instructive and fun reading)

Our worksite - and note that Pio's quartet: with Richie on the
burner, Ted on the concrete cutter and Brad on the grapple are already
at work.

We made several video options revealing the dynamics of today's implosion
of D-25:
What was remarkable to me was how the sequencing of the detonation was
controlled. Watch
how Mickey's team loaded and fused the explosives. Here is the
implosion sequence from still photos and from frames of the video.
Sharon brings us to the barge at the base of D-25

Lookup up D-25 - drilled and marked

Mickey in different configurations

Some more of Mickey's team: Mickey Rogers, Ken Tully, Dave Holland and
Philip Rogers

and here is Bret Rogers - cutting PVC sections

The main idea is to drop the Pearman columns and cap. Horizontal holes
(about 2.5" diameter) are drilled in an array specified by Mickey and Ken.
Then each hole is stuffed with 2 sticks of dynamite,
a clay dummy and stemming
block. Each component is tamped into place. When the dynamite is detonated
it wants to send compression waves in all directions. The stemming packs
prevent longitudinal (axial) propagation of the wave so that the
energy of the explosion is directed radially out from the drilled cylinder.
By sequencing the detonation pattern, in this case from bottom to top,
the columns fall as structural integrity is compromised at the base of
the columns. In addition, the two arms of the pier cap that overhand the
columns are timed to detonate early so that they drop before the rest of
the cap. Below is the loading procedure - first the dynamite with an inserted
blasting cap. Oh - the purple gloves are used to avoid skin absorption of
the dynamite which will make a terrible headache. Here is
a 12 Mb quicktime
video of Ken and Mickey loading
dynamite.
First the tools of the trade - dynamite which creates an compression wave
following ignition. This compression wave compromises the structural
integrity of the surrounding concrete and rebar. The compression wave
is constrained to an axial wave (away from the centerline of the hole that
contains the load) by the clay dummy and the stem blocks. Without these
each hole would act as a shotgun and the compression wave would propagate
down the longitudinal axis of the hole (or barrel in shotgon terminology).

Then clay dummies
 and stem blocks (packages of crushed rock that block the axial compression wave

Detonators - the silver end is inserted into the dynamite stick and provides
a 300 msec delay between activation and ignition

and finally the fuse line - red has a 25 msec delay while yellow introduces
a 9 msec delay. These are used to interconnect each loaded hole and
provides the time delays for properly sequencing the detonation.

Now for the loading process - first insertion of two sticks of dynamite with
an embedded detonator.

Tamping the dynamite cylinder into place

Inserting the clay dummy

Inserting a stemming block. This process is repeated for every hole
(approximately 6 foot penetration into the column).

Mickey connecting the detonator to the main system

The left and right array of loaded holes and you can see the different color
fuse lines used to sequence the ignition. This is what Mickey and Ken
call part science and part instinct. They first develop a plan for the
firing sequence and then, when they are loading holes, may make small
adjustments in order to achieve the desired explosive action and
sequencing.


Making the final connections

and a final inspection. Note that the pier cap overhangs
to the left and to the right are connected
with yellow lines (9 msec delay). The red lines have 25 msec delay.

and moving our morning home (the barge)

to outside the exclusion zone

and my photo spot, under the Ravenel

At the same time, Pio's team is sawing roadway segments and removing them
from the Grace. Here is Richie burning the side guard rails

and a view of the grapple and Pio's team

And the grapple picking up a roadway segment


